Table of Contents
Examples are valid for:
3D Camera Type:
- PhoXi 3D Scanner(2.14↑)
- Motion 3D Scanner(Beta)(2.16↑)
- Alpha 3D Scanner(2.18↑)
- Motion 3D Scanner(Official)(2.22↑)
TM Robot Version: Only Supports 2.14 and Above
3DVision License Dongle Key required.
Relevant Information #
- The Photoneo driver versions are as follows :
- TMflow 2.14.5600 (inclusive) and earlier is 1.8.2
- TMFlow 2.16(inclusive) ~ 2.20 (inclusive) is 1.9.4
- TMflow 2.22 (inclusive) ~ 2.24 (inclusive) is 1.13.4
- Please download the required installation file through the website : https://www.photoneo.com/downloads/phoxi-control/
- Enter Archive to find the corresponding version and choose Windows 10/11. Then enter your email to download Driver.

Software Installation #
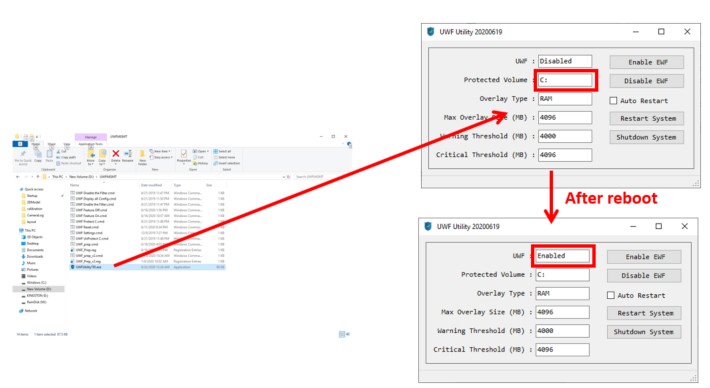
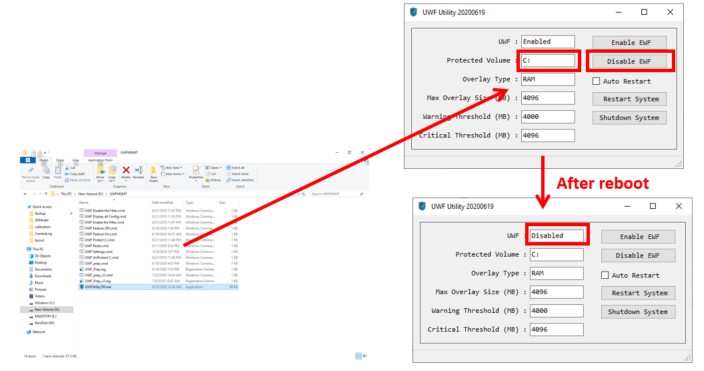
Disable UWF #
- Use UWF command under the path D:\UWFMGMT
- After opening UWFUtilityTRI.exe, set the target to C: and press the Disable button
- Reboot to complete disabling UWF

- Open UWFUtilityTRI.exe to confirm UWF is Disabled
Install Photoneo Camera Driver #
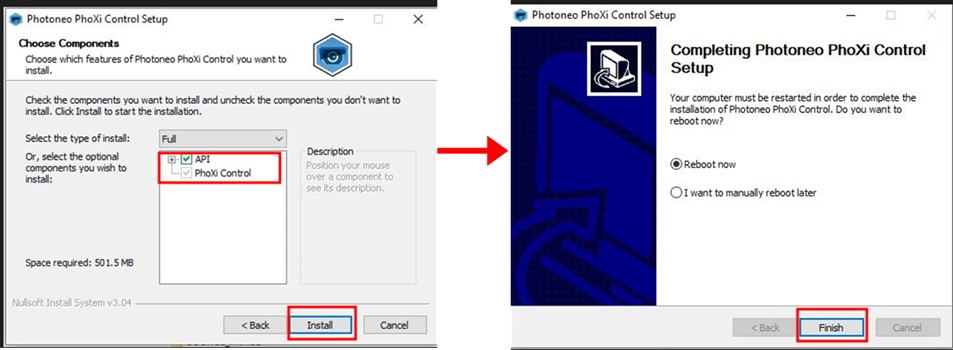
- Open PhotoneoPhoXiControlInstaller-1.8.2.-win64-STABLE.exe to start the download (according to your TMflow version).
- After opening the .exe file, click Next, then click I Agree.

- After confirming the path is correct, click Next.
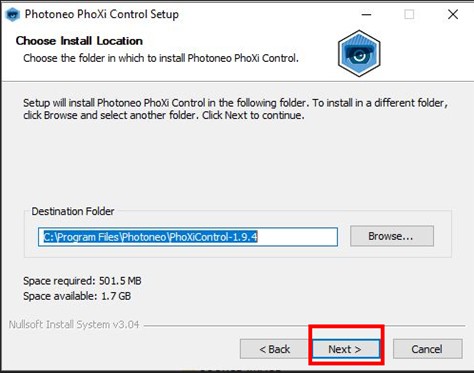
- Then click Next again
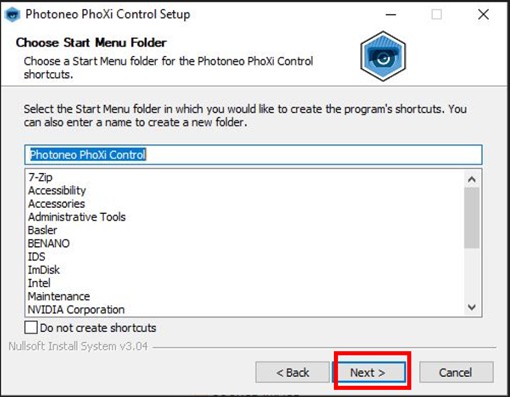
- The API option is selected by default. After confirming it is correct, click install.
- Wait for the installation to complete, then click Finish, and the computer will restart
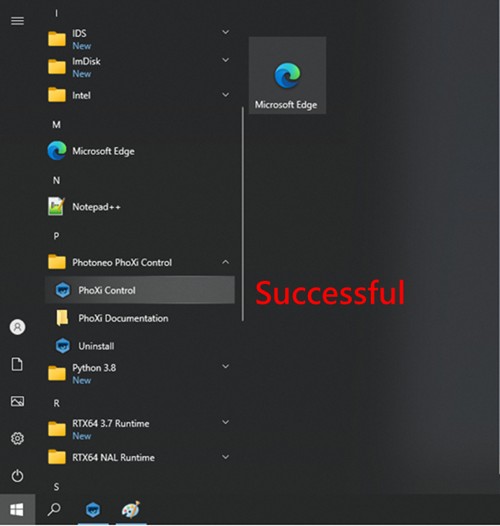
- After rebooting, verify whether the SDK was successfully installed.
Test & Configuration #
Configure the network card IP #
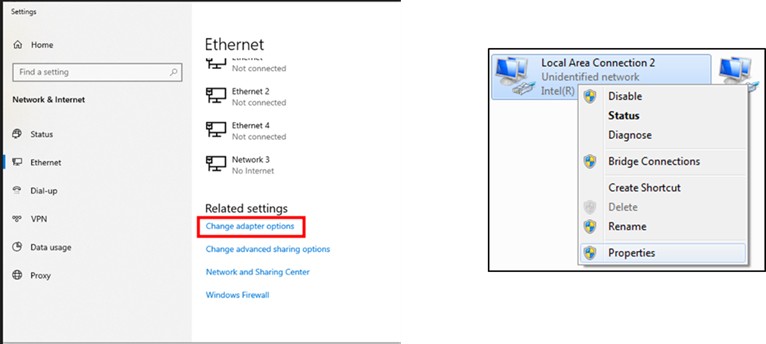
- Connect the IPC to the camera
- Open the Control Panel and change the adapter settings.
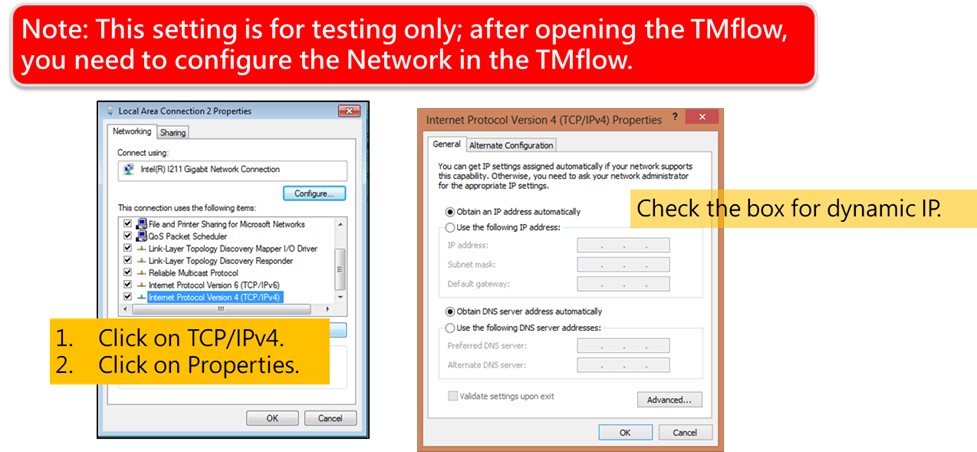
- Set the network card TCP/IPv4 to dynamic IP
 Test #
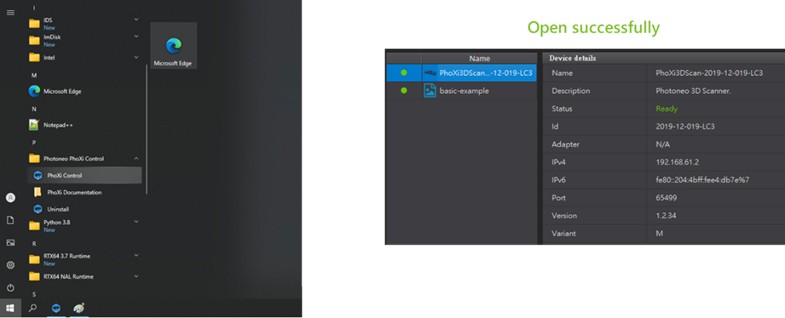
- Open PhoXi Control.exe
- After opening, wait about one minute, and you should see a camera that is not labeled as basic-example, which indicates that the camera connected to IPC is recognized.
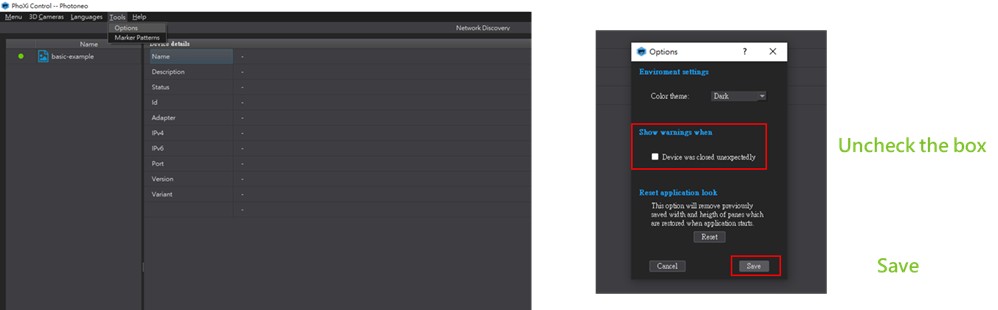
- After opening PhoXi Control.exe, go to the Tools menu and select Options.
- Open Options, uncheck the options under Show warnings when, and then save the changes.
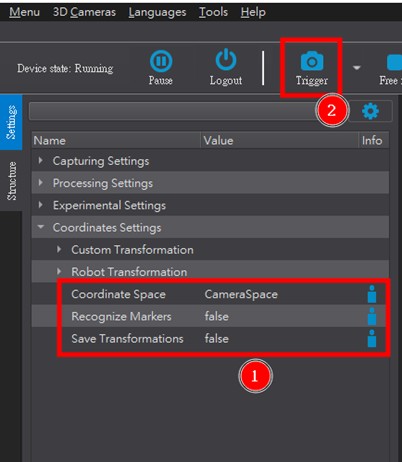
- Select the connected camera and confirm that the Coordinate Space is set as shown in image 1.
- Then click Trigger to take a shot; if the image capture is successful, the installation and configuration are complete.
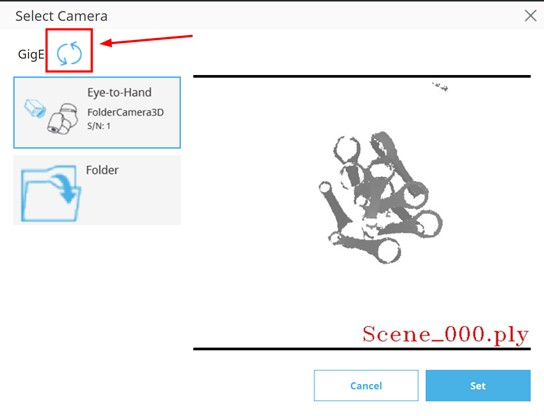
TMflow Network Setting #
Connect to Photoneo
- When using the 3D camera for the first time or after changing the network port, go to the Network settings in TMflow to check the network card IP configuration and verify if the IP is set to DHCP.
- If it is not set to DHCP, please check the DHCP option.
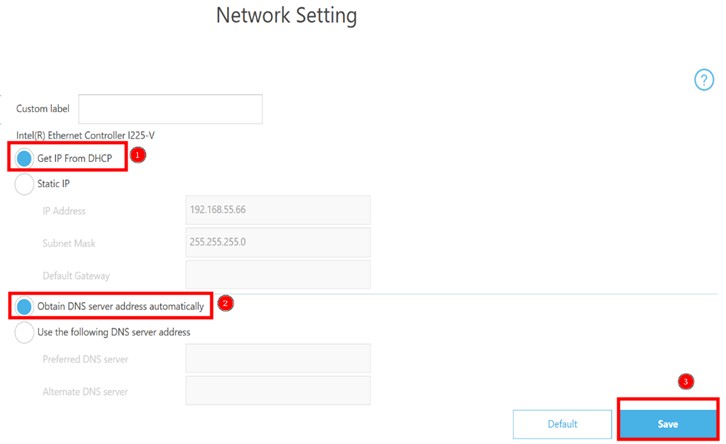
- After setting the IP, turn off the IPC restart it.
- After the restart, go to the vision page to reload the camera list, and you can connect and use it.
Notice
- When using the 3D camera for the first time, the network card setting will be on DHCP. However, if it was previously changed to a static IP, there may be connection issues when connecting to Photoneo, so please check if it is set to DHCP first.
- After the restart, go to the camera list page to reload the camera list, and you can connect and use it.
Enable UWF #
- Use the UWF command under the path D:\UWFMGMT
- After opening UWFUtilityTRI.exe, set the target to C: and press the Enable button
- Reboot to complete enabling UWF
- Open UWFUtilityTRI.exe to confirm UWF is Enabled