Table of Contents
Examples are valid for:
3D Camera Type: N36
GPU Driver Installation: refer to How to install NVIDIA GPU driver
TM Robot Version: Only Supports 1.76 2nd Editon and Above
3DVision License Dongle Key required.
Relevant Information #
- The benano driver versions are as follows:
- TMflow 1.8 series: 2.2.176
- TMflow 2 series: 3.4.715
- TMflow 2.20: 3.6.1621
- TMflow 2.24: 4.2.1821
![]()
- Please go to Esenso official website to register the account and download driver : Please refer to the step below about creating account and download driver
Register Account #
- Please go to Esenso official website to register the account and download driver :
https://community.ensenso.com/t/ensenso-sdk-downloads/58
Software Installation #
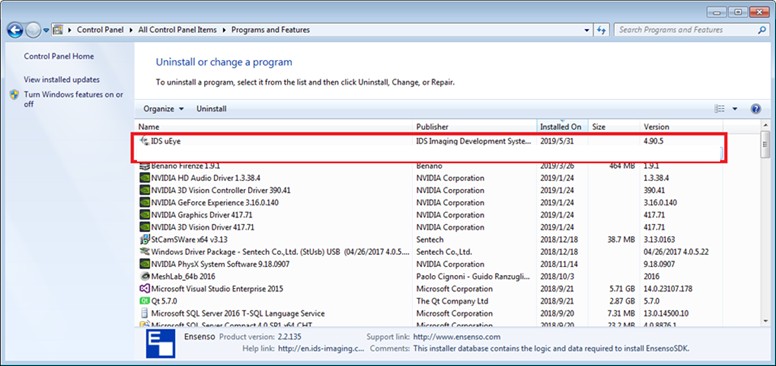
Check Ueye Driver Version #
- Refer to previous page for the corresponding TMflow version and verify if the driver version is correct
![]()
Disable EWF #
- Select the icon in the bottom right corner of the desktop.
- Click on the EWF program.
- Click on Configure…
- Select C:
- Choose “Disable” and check the Commit box.
- Click OK
- Restart the system to complete the settings
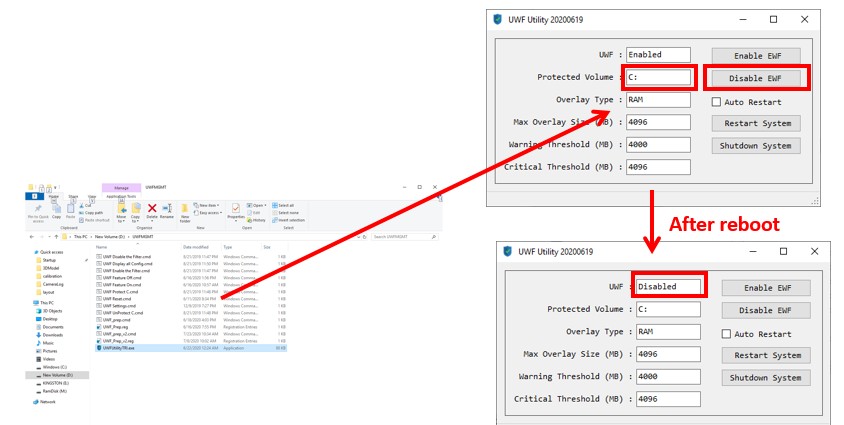
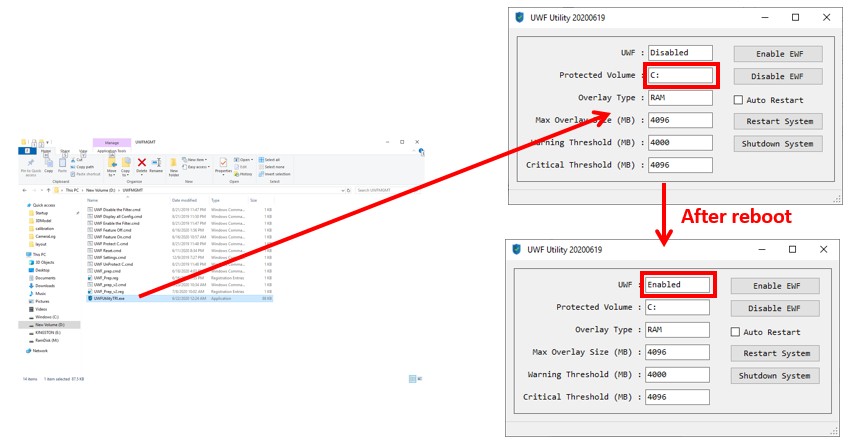
- Use the UWF command under the path D:\UWFMGMT
- After opening UWFUtilityTRI.exe, set the target to C: and press the Disable button
- Reboot to complete disabling UWF
- Open UWFUtilityTRI.exe to confirm UWF is Disabled
Install Ensenso Camera Driver #
- Click Next to the end
Camera Test #
Configure IP Address #
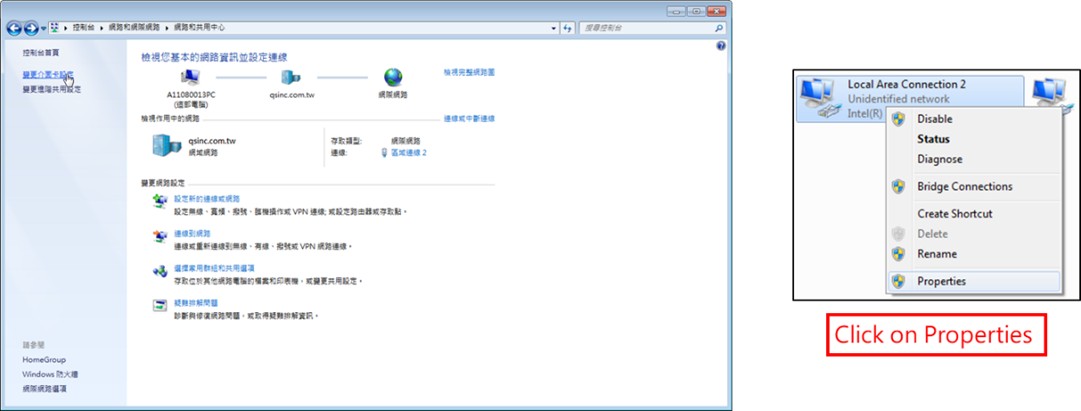
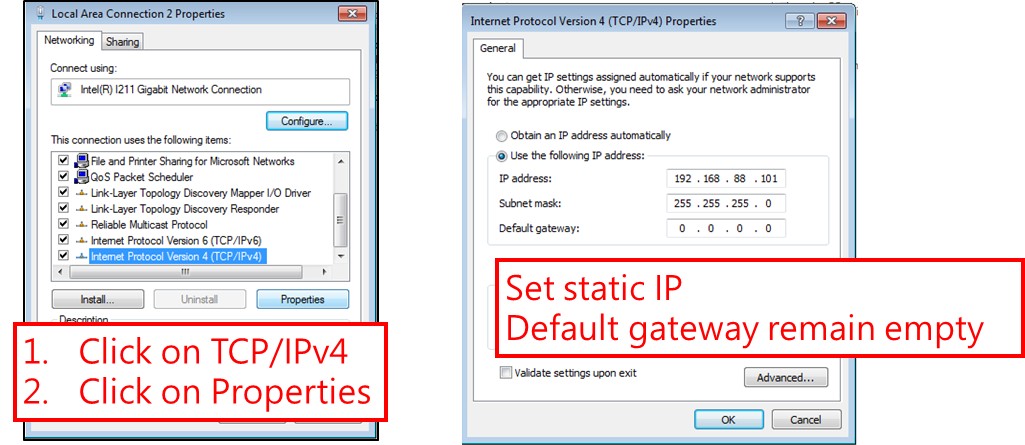
- Open the Control Panel to change the adapter settings.
- Set the network card TCP/IPv4 to a static IP

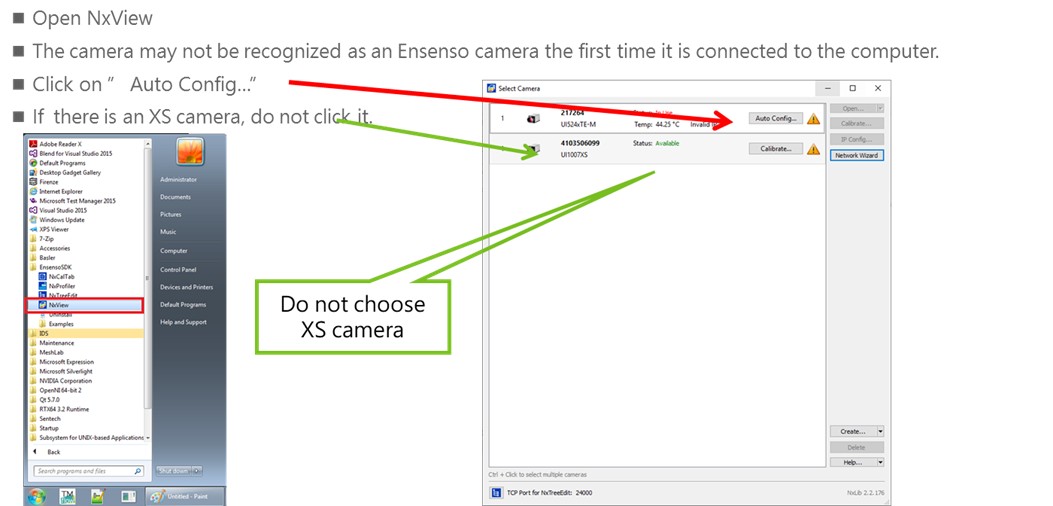
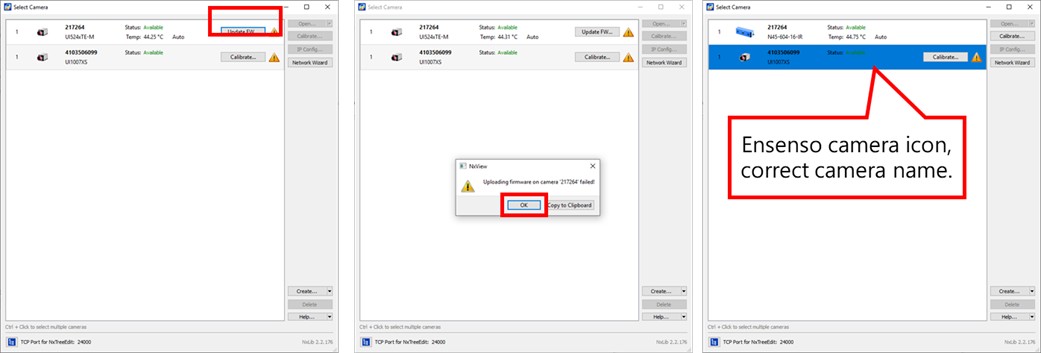
Open Camera Through NxView #
- After Auto Config, “Update FW…” will appear
- Click “Update FW…”
- It will show “fail”, but after pressing OK, if the camera is successfully recognized as an Ensenso camera, the process is complete.
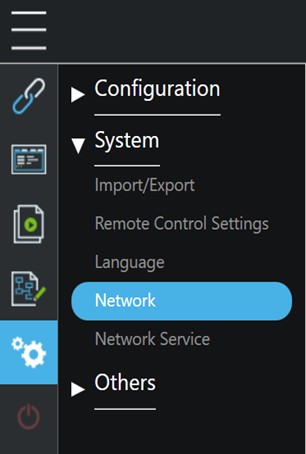
TMflow Network Setting #
Connect to Ensenso #
- When using a 3D camera for the first time or after changing the network port,
go to TMFlow’s Network Settings to check the network card IP configuration If it is DHCP - Do not use DHCP, as it will cause connection failure.
- If DHCP is enabled, follow the steps on the next page to complete the camera connection setup.
Network SOP (1/2) #
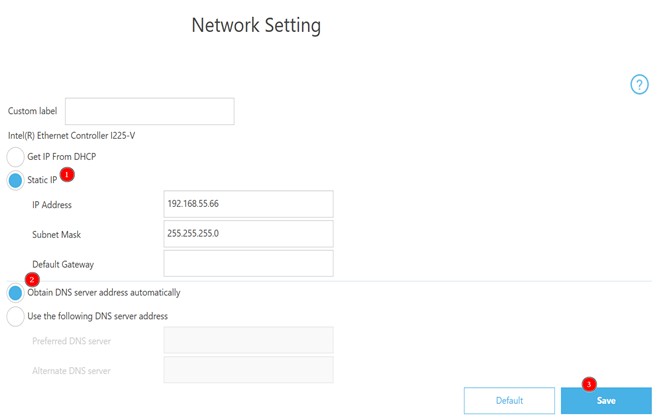
- Set the network card IP in TMflow’s Network to Static :
- IP Address : 192.168.xxx.xxx
- Subnet Mask : 255.255.255.0
- Gateway : Leave blank
Network SOP (2/2) #
- After setting the IP, turn off the IPC and restart it
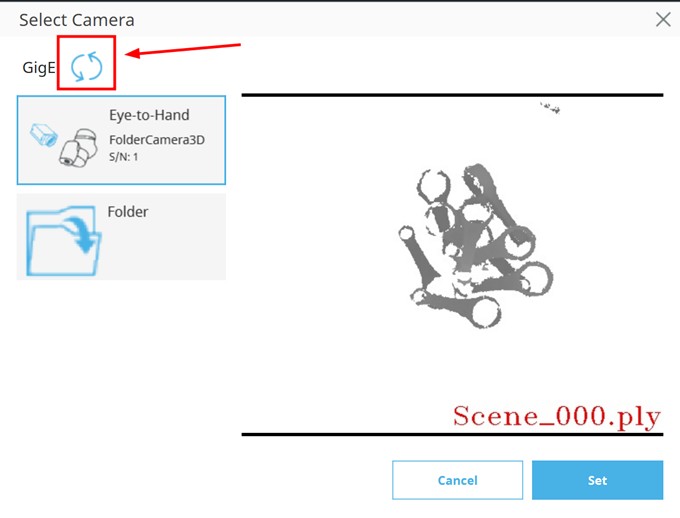
- After the restart, go to the vision page to reload the camera list, and you can connect and use it.
Notice
- When using the 3D camera for the first time or after changing the network port, setting the network card to DHCP may cause connection issues. Please refer to the SOP for reconfiguration.
- If the network card’s IP has been changed, please update the camera list on the camera list page to ensure proper camera connectivity.
Enable EWF #

- Select the icon in the bottom right corner of the desktop
- Click on the EWF program
- Click on Configure…
- Select C:
- Choose “Enable”
- Click “OK”
- Restart the system to complete the settings.
 Enable UWF #
- Use the UWF command under the path D:\UWFMGMT
- After opening UWFUtilityTRI.exe, set the target to C: and press the Enable button
- Reboot to complete enabling UWF
- Open UWFUtilityTRI.exe to confirm UWF is Enabled


