Examples are valid for:
TMflow Software version: 2.16 or above.
TM Robot Hardware version: HW 3.2 or above
Other specific requirements: None
Note that older or newer software versions may have different results.
TMflow offers a wide range of functionalities to improve automation operations, but not every project requires all its features. The purpose of TMcraft Shell is to allow users to customize and select the necessary TMflow functionalities based on project needs, simplifying the user interface.
Purpose of TMcraft Shell #
Customized Function Selection : #
TMcraft Shell enables users to tailor the TMflow interface and features to meet specific project requirements.
Simplified Integration Process: #
Through TMcraft, users can write shell code and import it into TMflow. Once imported, the TMflow interface will only display the functions and data defined in the TMcraft Shell, helping users quickly set up projects and access relevant information.
Application Scenario #
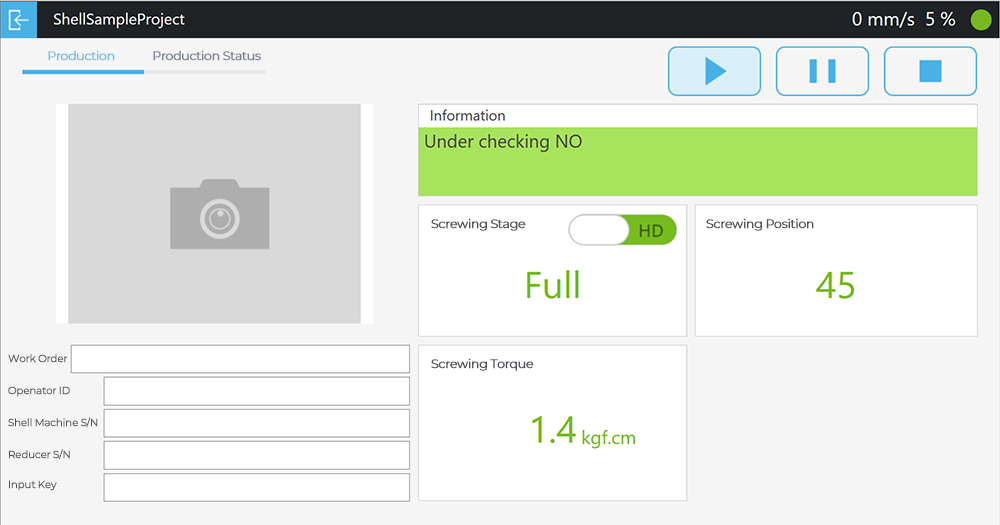
Imagine a factory project that requires production monitoring through TMflow. Although TMflow offers numerous features, not every function is relevant to this project. In this case, users can leverage TMcraft Shell to select the necessary TMflow functions based on the project requirements. These selected features can then be compiled into a shell file and imported into TMflow. After restarting TMflow, the interface will automatically adjust to display only the relevant variables and functionalities, speeding up the setup process and improving the efficiency of production monitoring.
If you’d like to quickly get started and learn how to customize the interface according to project needs, refer to the example code .
Demo Video #
Features #
- Auto-login to the user account
- Automatically connect and gain control of the robot
- Automatically set WC11 as the current running project
- Click the Run button to start the project
- Display Global Variables on the interface
- Display Runtime Variables on the interface
- Modify work orders, employee IDs, casing serial numbers, and gearbox serial numbers as runtime variables in real time
- Adjust the locking phase via a Toggle Button
- Click the Pause button to pause the project
- Click the Stop button to stop the project
How-to (Example : Displaying Runtime variables) #
- Use Visual Studio for coding
- Refer to the TMcraft API
- Utilize API methods to interact with TMflow
- Retrieve real-time variables


