Examples are valid for:
TMflow Software version: TMflow 2.16.7400 or later.
TM Cobot Series: TM AI Cobot (HW3.2) / TM AI Cobot S (HW5.0x)
Other specific requirements: TMcraft Packer 1.12.1100, Windows10 64bit, Visual Studio 2022 with WPF/C#.
Note that older or newer software versions may have different results.
Goal #
This is for the developer who wants to create their own user interface in TM cobot system.
Change Log #
| Date | Description |
| 2024-09-20 | 1st release |
Abbreviations and Glossary #
| Term | Definition |
| TMflow simulator | TMflow 2.16 or later version that installed on a PC |
| TMcraft | A library package for developers to create their own application |
| TMcraft Packer | A tool to packer the source code to import to TMflow |
Specification of the Environment #
| (1) Hardware items | |||
| Note: | |||
| Items | Name ID | Version | Description |
| Product Series | TM AI Cobot | HW3.2 | |
| Product Series | TM AI Cobot S | HW5.0x | |
| (2) Software items | |||
| Note: | |||
| Items | Name ID | Version | Description |
| Operation System | Windows OS | Windows10 64bit | [Preparation 1] |
| Application software | Visual Studio | 2022 with WPF/C# | [Preparation 2] |
| Application software | TMflow | 2.16.7400 or later | [Preparation 3] Install TMflow simulator, which could be found at TM download center (registration required): TMflow. |
| Application software | Source code of the Welding Node | 1.0.0.70 | [Preparation 4] Download source code of Welding Node. Click here WeldNode_v1.0.0.70 Sample Code |
| Application software | TMcraft Packer | 1.12.1100 | [Preparation 5] Could be found at TM download center: TMcraft/2.14. |
| Reference | TMcraft Development Kit | 2.14 | [Preparation 6] Manual for reference, could be found at TM download center: TMcraft/2.14. |
| Reference | TMscript | 2.14 | [Preparation 7] Manual for reference, could be found at TM download center: TMscript/2.14. |
Introduction #
The Welding Node provides a user-friendly interface specifically designed for welding applications using TMcraft. This article offers a straightforward tutorial to help you grasp the basic logic behind Welding Node, giving you insights into developing TMcraft applications for similar use cases.
By following steps, you can build and debug the source code of Welding Node and then deploy to a cobot or TMflow simulator on your laptop. Please note that this source code is a simplified version just for demonstration.
TMcraft Node is a customizable node that third-party developers can use to create their own application user interfaces. It is built using the UserControl component, with the TMcraft library supporting C# exclusively.
Once the source code is complete, you can package it using the TMcraft Packer and then import it to a cobot or the TMflow simulator for deployment.


See Welding Node in operation here:
https://www.tm-robot.com/en/docs/welding-node-welding-application-guide-with-tmflow2-and-tmcraft/
Step-by-step tutorial #
[Step1]
Unzip the file in [Preparation 4].
[Step2]
In the folder, you will see those sub folders:
- WeldNode => source code of Welding Node
- WeldNodeApp => simulator to run the WeldNode without cobot or TMflow simulator
- TMCdll => TMcraft library
Execute *.sln to open the source code.

[Step3]
Under the WeldNode project, *.xaml is the UI design and *.cs is the codes. We use UserControl component to create the WeldNode.
Click BUILD to build them.


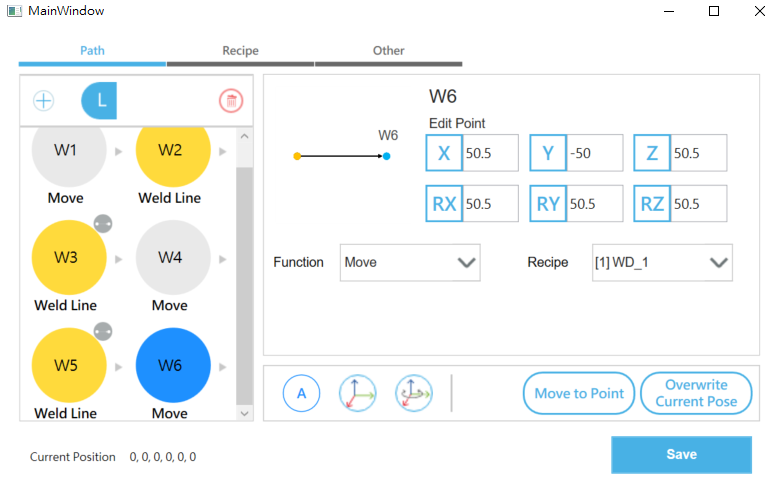
[Step4]
Run the project WeldNodeAPP (this is the container for simulation to run the UserControl component for WeldNode without TMflow) or you can navigate to the exe file here:
…\WeldNode_v1.0.0.70 Sample Code\WeldNode_WeldFunction_ML\WeldNodeApp\bin\Debug\net6.0-windowsWeldNodeApp.exe

You can also modify the source code for testing.
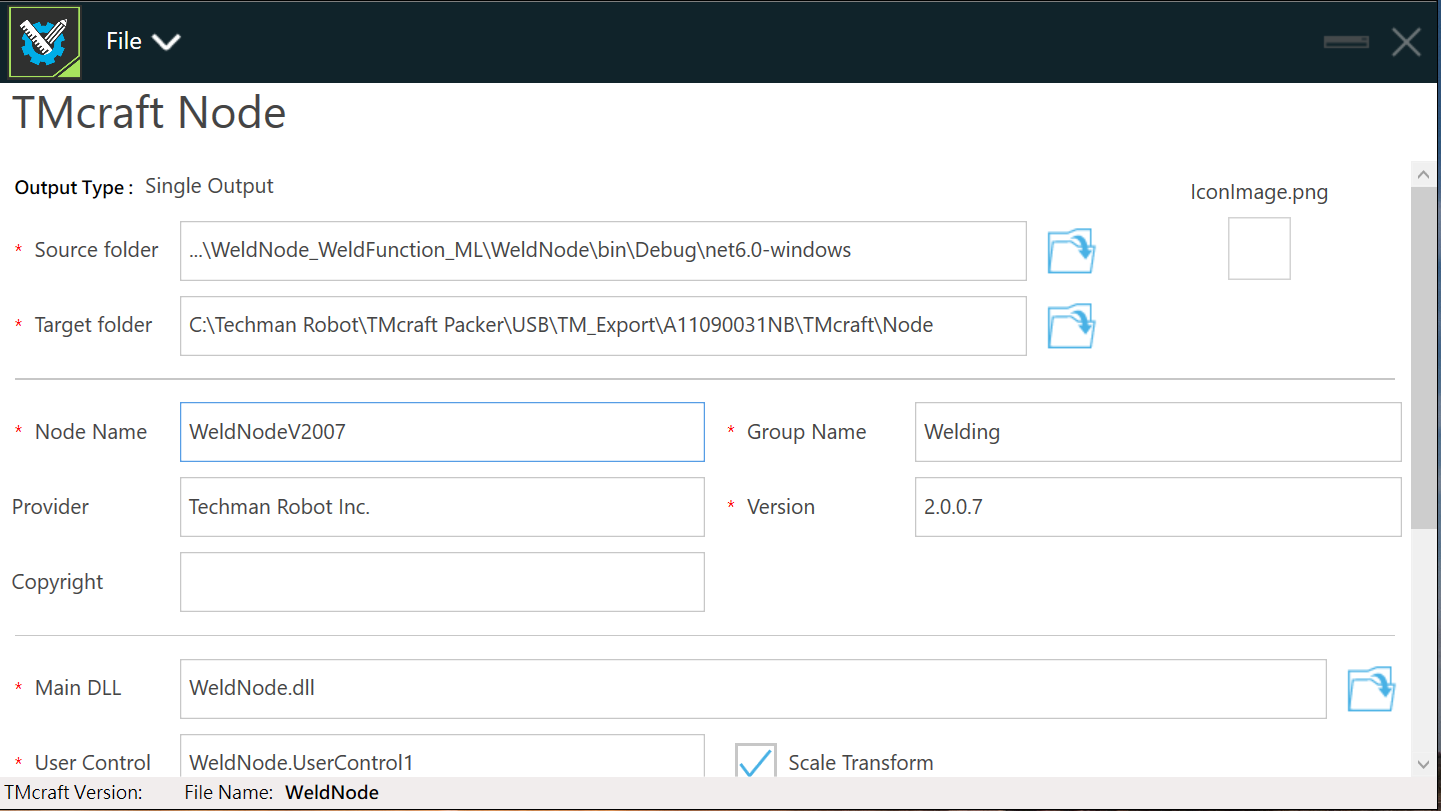
[Step5]
If you want to deploy the result to a real cobot or TMflow simulator, you will need the TMcraft Packer [Preparation 5] to pack it and transfer it. Refer to the documentation in [Preparation 6] for more information.